 I found this super easy pattern to make Studio aprons; it is a SewSimple Simplicity A1971. You can make small to ex-large aprons using cotton, calico, or broadcloths.
Please don't hesitate to leave questions below; we have a awesome group of ladies that visit the studio so if I cannot answer your question someone else can.
Easy Reversible Aprons for the Art Studio
Creating your own apron is gratifying and this apron is really easy to make; all my girlfriends seem to love them. So grab some cool fabric and let's get started with your fashionable apron.
What You Need:
Handmade Pattern or Simplicity Pattern # A1971
7/8 yards 45" wide for Apron
1/2 yards 45" wide for Bands and Ties
3/8 yards 45" wide of Pocket Lining
Thread & Needle
Purchase same as amount for Contrast
Make A Apron
Make a apron pattern or purchase one from Simplicity or McCall's, etc… I will be showing you how to use Simplicity A1971 in this short video.
1ST Pre Shrink Your Fabric by Washing
First cut out your pattern pieces and lightly press the pieces on very low heat, this makes it much easier to cut out. You will use all 7 pieces to sew your apron together. Be sure to read the pattern instructions before you begin.
Sewing Directions Made Easy
1. Wash and Iron your fabric. Lay and cut out your pattern piece. Transfer all you markings to the wrong side of fabric before removing your pattern.
2. With right sides together, pin apron band to upper edge of your apron. Stitch your seam and press the band up.
 Pressing throughout your sewing makes things nice and tight.
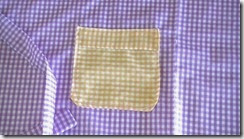
3. Prepare and sew your pockets together.
4. Then place on the right side of your apron and sew on leaving the top edge open. Do the same for the contrasting side of the apron.
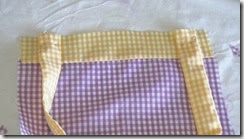
 5. Fix your neck strap and your tie ends by folding them in half and stitching along one side.
You can leave the ends of your neck strap open. The tie ends you will close off one end. Turn them all right side out and press.
Pin the neck strap to the top edge of your apron.
You will pin the tie ends to the side of your apron.
You're doing great.
6. Place the right side of the contrast and the apron together matching seams and having raw edges together.
Stitch around the entire apron leaving a about 3 inches at the top edge so you can turn your apron right side out.
7. Turn your apron right side out through your opening in the top edge.
Sewing Top Edge of Apron
Simplicity Pattern 1971 is an awesome pattern for beginners wanting to learn to sew. It is not too hard and you will have success within an hour's time.
 You can add accessories to your apron such as buttons and bows for a trendy look.
Please leave your comments and suggestions below, we loving hearing from you.
Thank you for visiting our studio please refer your friends to our studio; we look forward to having you visit again soon.
© whimsypapermache.com